Saturday, November 22, 2014

DoS website with GoldenEye – Layer 7 DoS tool with KeepAlive NoCache

It takes 15 seconds to bring down a web server! Tested GoldenEye Layer7 tool with KeepAlive NoCache.


I’ve talked about testing few DoS too tools that can put heavy load on HTTP servers in order to bring them to their knees by exhausting the resource pool. GoldenEye is the first of those tools and it is one of the newest I discovered in GitHub. You can DoS website with GoldenEye and bring it down almost within 30 seconds depending on how big their memory pool is. Of course, it wont work on protected servers and servers behind a proper WAF, IDS, but this is a great tool to test your own Web Server for load testing and amend your iptables/Firewall rules accordingly. I will put several warnings and disclaimers in this post so that even the most feeble minds wont be able to deny reading those.


Tuesday, November 11, 2014

Hack website password using WireShark

Read full details here: Hack website password using WireShark


Did you knew every time you fill in your username and password on a website and press ENTER, you are sending your password. Well, of course you know that. How else you’re going to authenticate yourself to the website?? But, (yes, there’s a small BUT here).. when a website allows you to authenticate using HTTP (PlainText), it is very simple to capture that traffic and later analyze that from any machine over LAN (and even Internet). That means someone can hack website password for any site that is using HTTP protocol for authentication.

Well, to do it over Internet, you need to be able to sit on a Gateway or central HUB (BGP routers would do – if you go access and the traffic is routed via that).


But to do it from a LAN is easy and at the same time makes you wonder, how insecure HTTP really is. You could be doing to to your roommate, Work Network or even School, College, University network assuming the network allows broadcast traffic and your LAN card can be set to promiscuous mode.
So lets try this on a simple website.

I will hide part of the website name (just for the fact that they are nice people and I respect their privacy.). For the sake of this guide, I will just show everything done on a single machine. As for you, try it between two VirtualBox/VMWare/Physical machines.
p.s. Note that some routers doesn’t broadcast traffic, so it might fail for those particular ones.


Read the rest of it here: Hack website password using WireShark

Wednesday, November 5, 2014

No internet for me!

Read full details here: No internet for me!

No Internet for me!!!
I am moving to a much faster Fibre connection, so temporarily living on a Mobile Internet.
 
This was me for first few hours:

Then this happened!

BoooYaaaa

  Feel free to comment via my Facebook or Twitter account in the meantime.

Enjoy and stay safe everyone.

Read the rest of it here: No internet for me!

Wednesday, October 29, 2014

IPv6 issues: Localized Denial-of-service caused by incorrect NXDOMAIN responses from AAAA queries

This is an unusual situation and a misconfiguration on DNS servers that can be exploited using a simple AAAA DNS query. This causes a localized Denial-of-service situation where users behind a specific resolver will get:


Read the rest of it here: IPv6 issues: Localized Denial-of-service caused by incorrect NXDOMAIN responses from AAAA queries

Tuesday, October 28, 2014

Delete clean cache to free up memory on your slow Linux server, VPS

Read full details here: Delete clean cache to free up memory on your slow Linux server, VPS

Many Linux systems, servers and VPS’s run on low memory and over time you will see a degradation of speed and responsiveness. By default, Linux got excellent Memory Management and it knows when to clean up cache to free up enough Memory to execute the next command. However, saying that, more new features being added to Linux everyday and when you are playing games, running a Web Server, a Database (i.e. MySQL, PostgreSQL, MariaDB etc.), Network Storage (NAS / SAN ), you will see there’s a drop on speed and responsiveness. By deleting and cleaning pagecache, dentries and inodes related cache data from Memory, you can get free up some of your Memory (RAM) which then makes rest of system work bit faster. This article will show you 3 different options to delete and clean cache to free up memory on your slow Linux server and small VPS’s.


Using drop_caches to clean cache to free up memory

Starting Linux Kernel v2.6.16 ono we have a new mechanism to have the kernel drop the page cache and/or inode and dentry caches on command, which can help free up a lot of memory. However, before we do that, we need to discuss about clean and dirty caches.

Clean and dirty caches

When you run something on a Linux system or server, Kernel will try to cache the response for a period of time so that the next time the same request is made, instead of running a complex lookup in disk/process, it can just fetch that info directly from Memory/RAM and send back a response. This is one of the main reasons Linux systems are so much faster and responsive. Alternatively, Linux systems will store data/info in Memory first before writing it to disk. So it goes both ways. Ideally, the data in Disk/database should be the same in Memory. But when you’re playing games, or it’s a busy Linux server, there will be some delay before these two (disk-data and memory-data) can sync up.
Cleaning cache is easy. But in Linux we have what we call clean and dirty cache.Let’s have a quick look at the definition of these two types of caches and later I will discuss why they are important when you clean cache.

Dirty Cache

Dirty Cache refers to data which has not yet been committed to the database (or disk), and is currently held in computer memory. In short, the new/old data is available in Memory and it is different to what you have in database/disk.

Clean Cache

Clean cache refers to data which has been committed to database (or disk) and is currently held in computer memory. This is what we desire where everything is in sync.

Read the rest of it here: Delete clean cache to free up memory on your slow Linux server, VPS

Monday, October 27, 2014

Fixing resolution problem on Linux after locking workstation

Read full details here: Fixing resolution problem on Linux after locking workstation

This is a pesky and annoying problem. I often lock my Kali workstation and when I try to log back in the next time, the resolution changed to 640x480 instead of my standard resolution of 1280x1024. This is very simple way without changing any system files for fixing resolution problem on Linux after locking workstation. I am almost certain Debian flavored Linux distros all have similar issues (i.e. Ubuntu, Linux Mint etc.).

Incorrect resolution

It’s very hard to show resolution issues using screenshots, but I took a screenshot of my whole desktop when the resolution was incorrect.
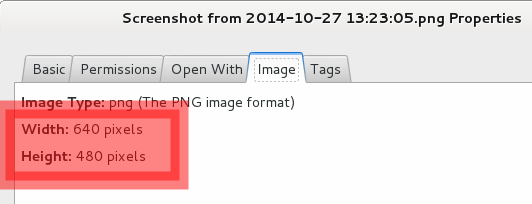
See image properties:
  1. Width: 640 pixels
  2. Height: 480 pixels
Fixing resolution problem on Linux after locking workstation - blackMORE Ops - 1
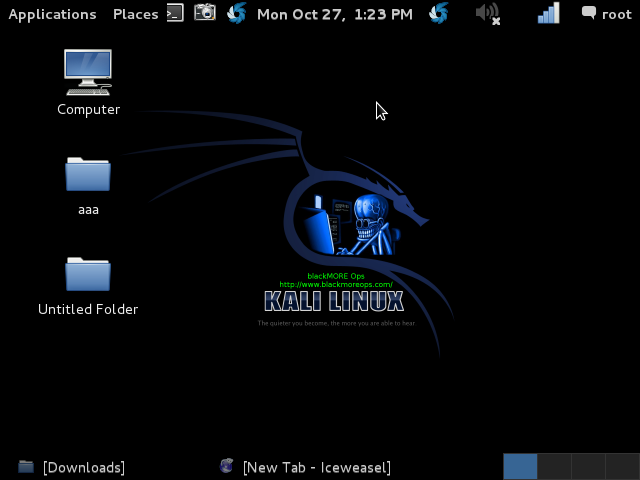
And here is the actual screenshot:

Fixing resolution problem on Linux after locking workstation - blackMORE Ops - 2

Not sure how much of it is clean from the screenshot, but I had humongous icons all over the place and a tiny display. You can actually get a feeling of it by comparing the cursor and text size.

Fixing resolution problem on Linux

I tried doing this an that, but in most cases they were too complicated. Few ways I could fix it:
  1. Restarting my Linux (duh!, it’s a no brainer)
  2. Restarting gdm3 (in Ubuntu or similar, it would be lightdm) – service gdm3 restart or sudo service lightdm restart
  3. Logoff and relogin (which essentially re-initiates display manager – i.e. gdm3 or lightdm).
  4. Shaking my monitor really hard – well, it used to work on my old CRT monitor!! but that was a different issue…
But the next one was the QUICKEST fix for sorting out incorrect resolution on my Linux after locking it.

Read the rest of it here: Fixing resolution problem on Linux after locking workstation

Tuesday, October 21, 2014

How to view Bash history without line numbers?

Read full details here: How to view Bash history without line numbers?


bash history command is very useful. It gives you an complete view of what commands you ran. By default bash  historycommand will give you all your previous commands with Line numbers. It’s the default behavior. However when you’re trying to copy-paste those commands again, you have to manually remove those Line numbers. This becomes rather annoying when you are trying to copy paste a lot of commands at the same time. This is very simple guide on how to view bash history without line numbers.

bash history with line numbers

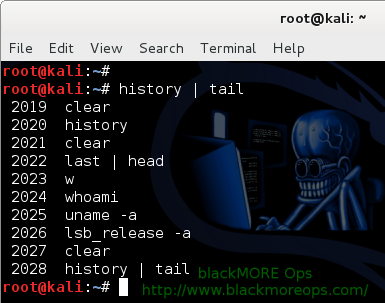
When you type in history in your bash terminal, following what you see.
root@kali:~# history 
-------snip------------
 2002  clear
 2003  ls
 2004  cd
 2005  top
 2006  nethogs wlan0
 2007  htop
 2008  sar -r
 2009  free -m
 2010  pstree
 2011  pgrep gdm3
 2012  w
 2013  who
 2014  last | head
-------snip------------
This is very normal behavior.


Read the rest of it here: How to view Bash history without line numbers?